
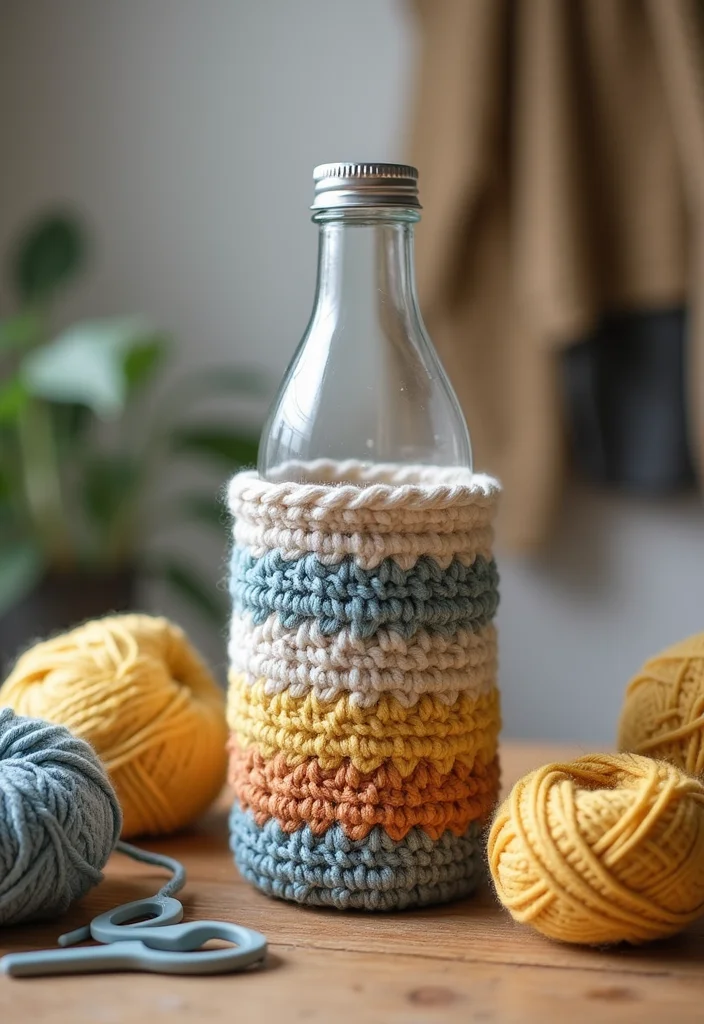
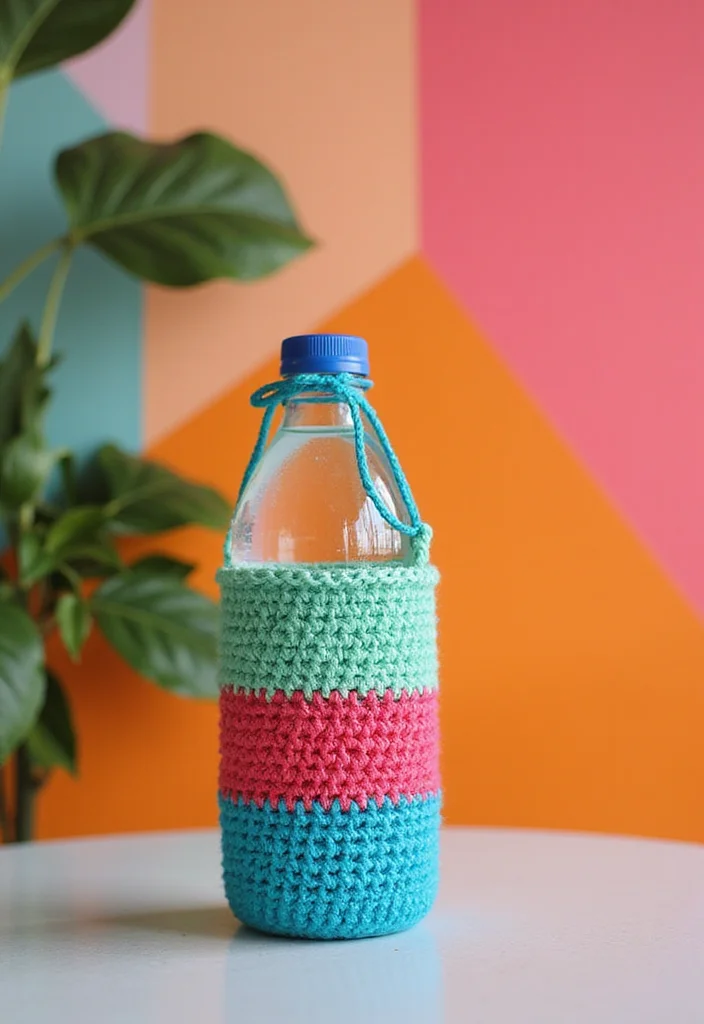
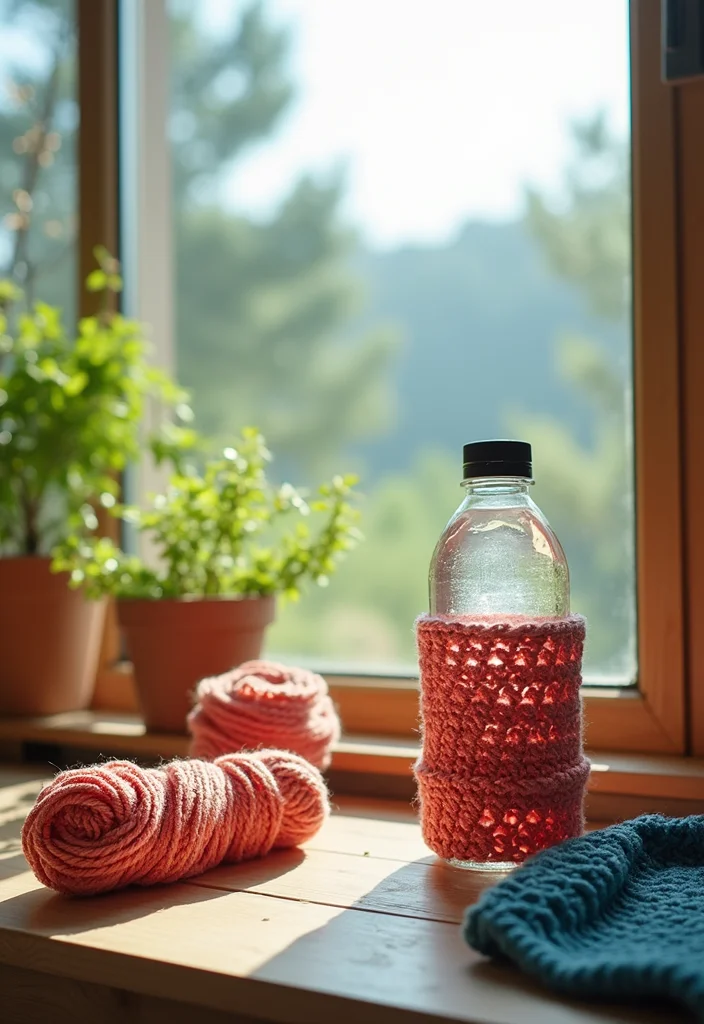
If you’re like many of us, you may have found yourself increasingly conscious of the impact of single-use plastics on our planet. That’s why I created this guide about a fun and practical solution: a crochet water bottle holder. Not only does it help you stay hydrated on the go, but it also lets you express your creativity while contributing to eco-friendly living.
This post is for anyone who loves DIY projects, especially those passionate about crafting their own accessories. If you enjoy crochet or are just starting out, you’ll find plenty of inspiration here. Whether you’re a newbie or a seasoned crafter, this guide will help you create something beautiful and useful that fits your eco-conscious lifestyle.
Inside, you’ll discover a step-by-step approach to making your own crochet water bottle holder, along with 20 exciting craft inspirations to take your projects to the next level. From choosing the right yarn to personalizing your holder with pockets and colors, each section offers practical tips that will enhance your crafting experience. You’ll not only save money by making your own accessories, but you’ll also gain skills that can transform how you approach DIY home decor. So grab your crochet hook, and let’s dive into a world of creative possibilities!
Key Takeaways
– Learn how to select the best yarn for durability and style to match your eco-friendly goals.
– Discover essential supplies that streamline your crochet process, ensuring you have everything you need ready before starting.
– Master basic crochet stitches that serve as the foundation for your projects, making it easier to tackle more complex designs later.
– Explore unique ideas for personalizing your water bottle holder with functional pockets and seasonal themes.
– Join crochet communities for support, inspiration, and the chance to share your creations with others who share your passion.
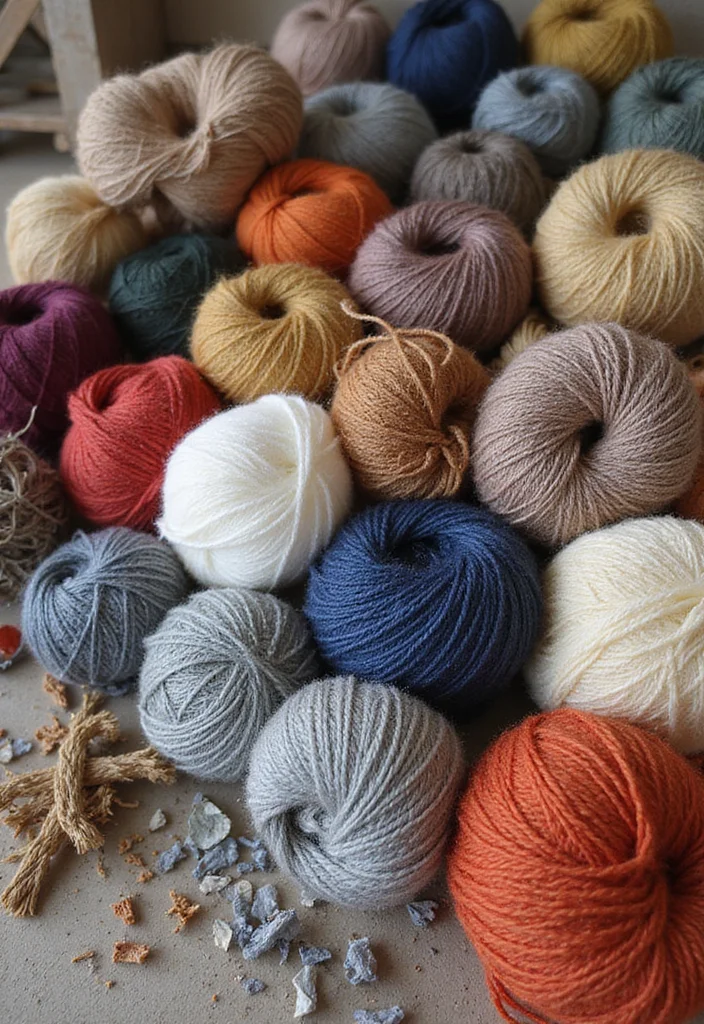
1. Choose Your Yarn Wisely
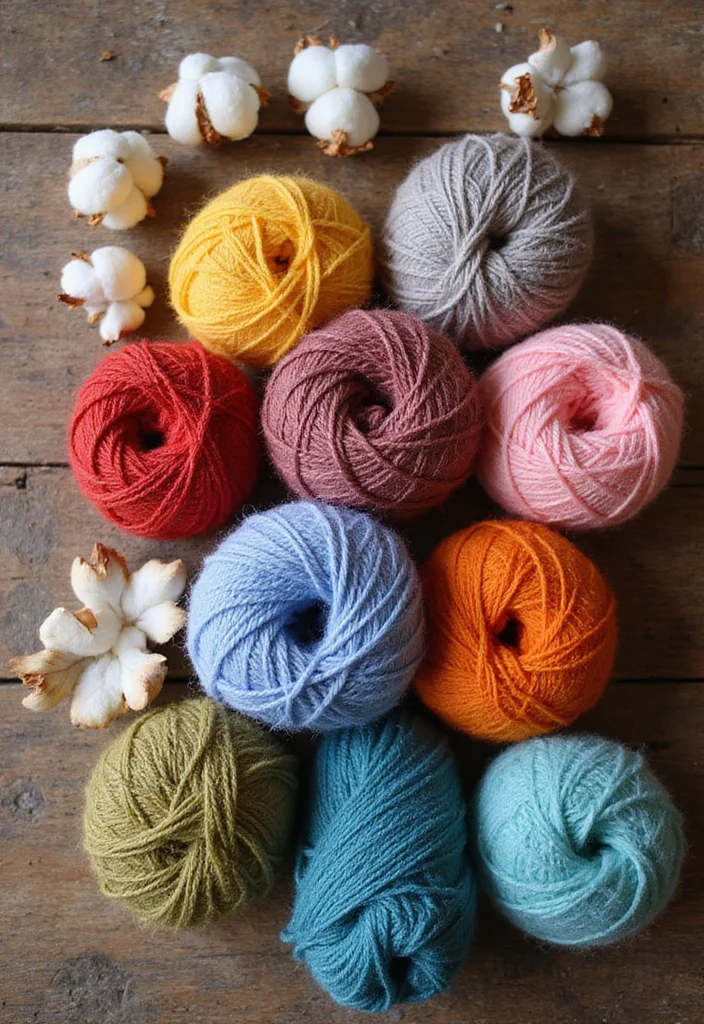
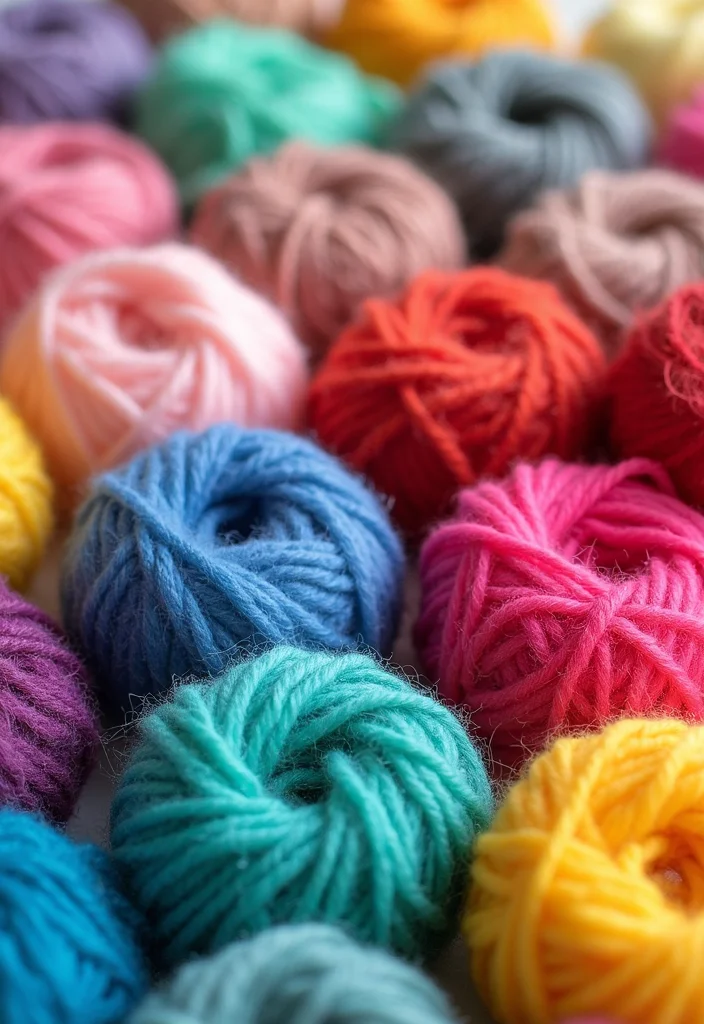
Choosing the right yarn is essential for creating a beautiful water bottle holder. Cotton yarn is a great option because it’s both durable and washable. You might want to consider organic cotton or recycled yarn for an eco-friendly twist. The color choices are endless! You can opt for bright colors to make your holder stand out or stick with neutral tones for a more subtle look. Pinterest is buzzing with these ideas, showcasing how vibrant yarn can elevate any crochet project.
To get started, look for yarn labeled for home decor projects. It’s also wise to check if your yarn resists fading, especially if you go for bright colors. Don’t forget to test different textures in your hands to find what feels best. Making a thoughtful choice here not only sets a solid foundation for your holder but also supports sustainable crafting.
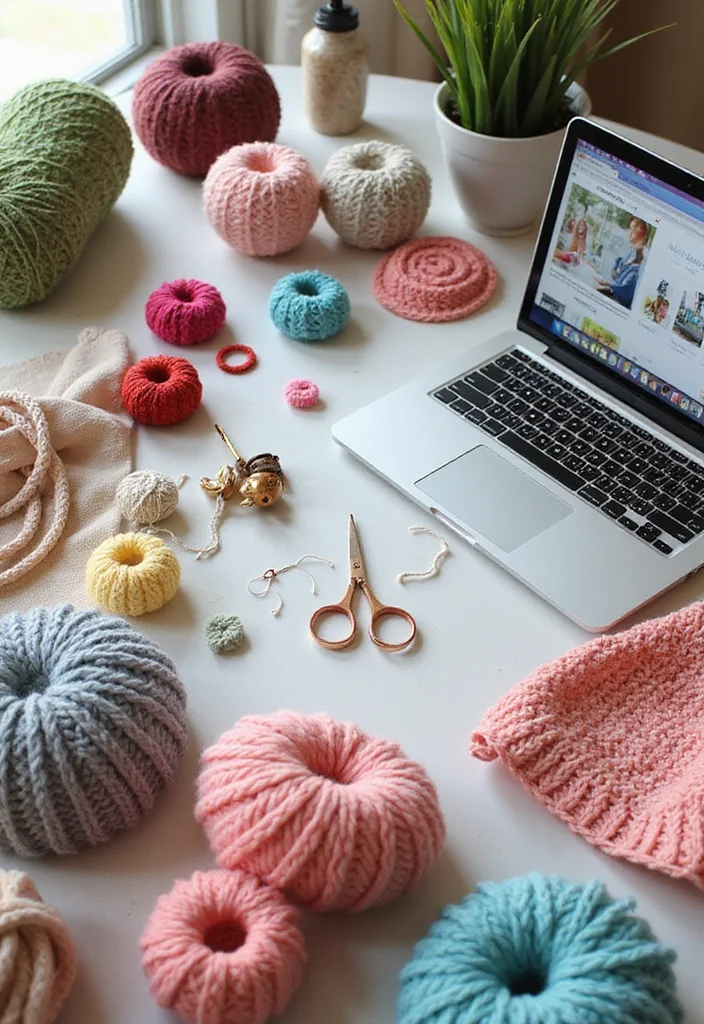
2. Gather Your Supplies
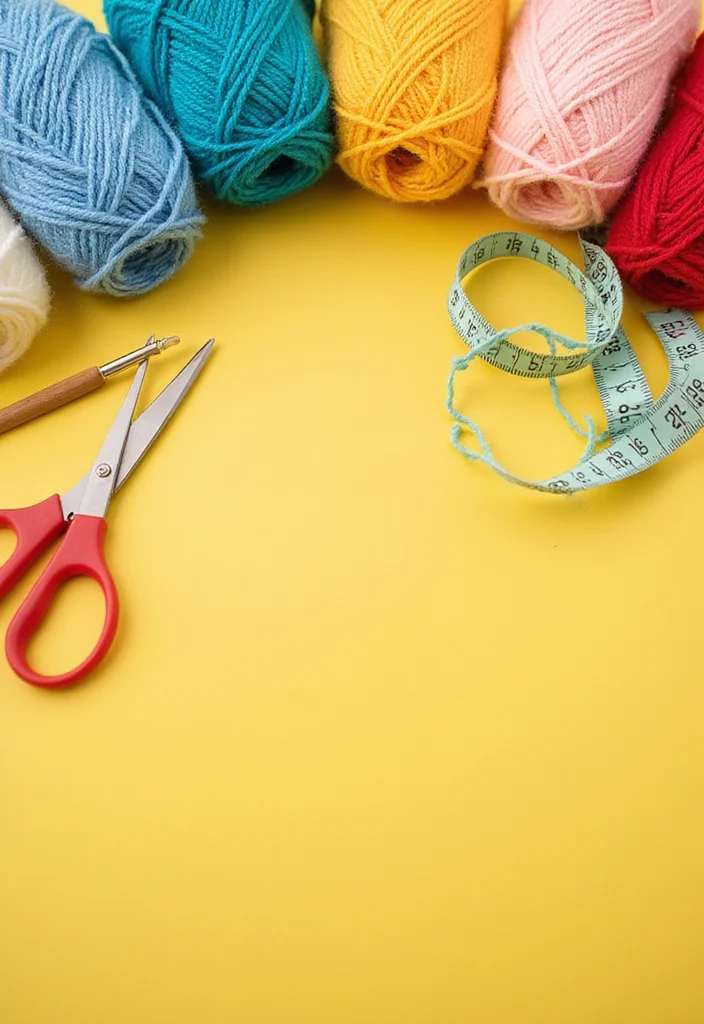
Before diving into your crochet project, gather all necessary supplies. Along with your yarn, a crochet hook, usually size H/8 (5 mm), works best for most worsted weight yarns. Don’t forget scissors, a yarn needle for weaving in ends, and measuring tape to ensure your holder fits perfectly around your bottle. Having everything on hand makes your crafting experience smoother and more enjoyable.
Create a checklist to keep yourself organized:
– Yarn (cotton or sustainable blend)
– Crochet hook (size H/8 preferred)
– Scissors
– Yarn needle
– Measuring tape
With everything ready, you’ll avoid those frustrating moments of searching for supplies mid-project and keep your focus on crafting.
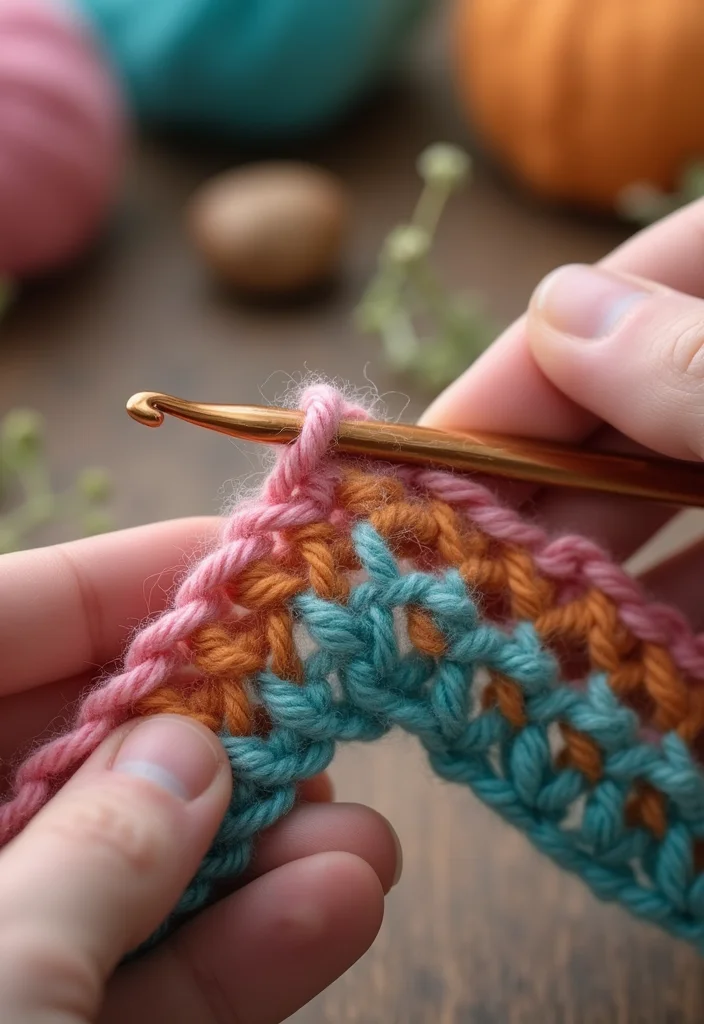
3. Learn Basic Stitches
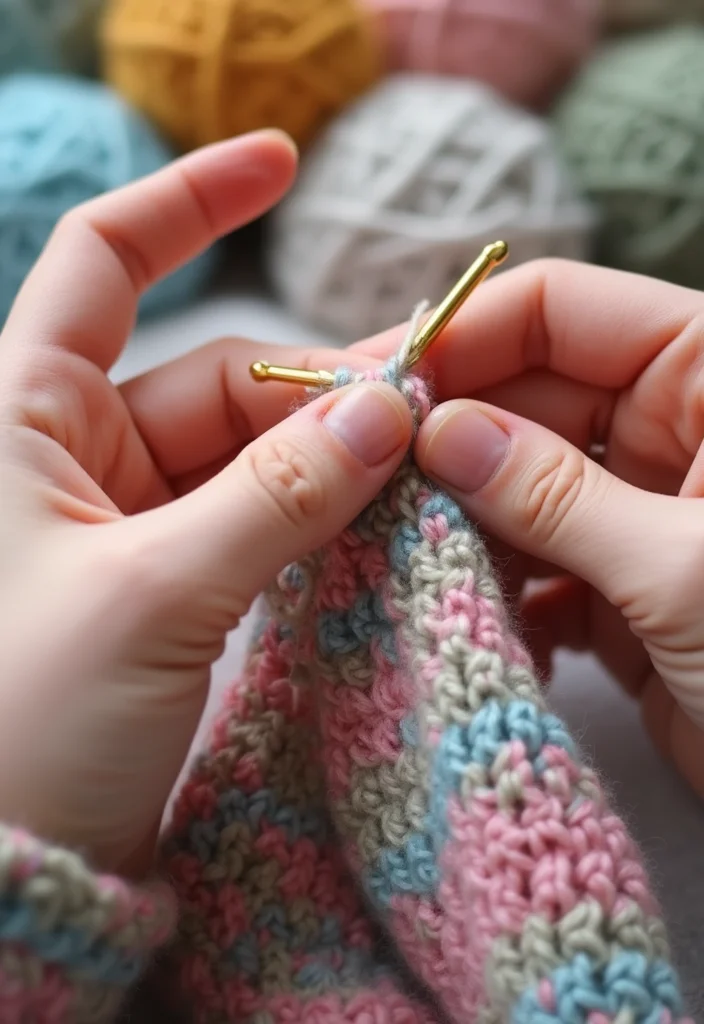
Getting familiar with basic crochet stitches is key before starting your water bottle holder. Focus on mastering single crochet and double crochet stitches. The single crochet creates a strong, tight fabric, while the double crochet gives your project a looser, airy feel. Learning these stitches will help you control your work beautifully.
Here’s a simple guide to practice these stitches:
– Single Crochet (sc): Insert your hook into a stitch, yarn over, pull through, yarn over again, and pull through both loops.
– Double Crochet (dc): Yarn over, insert your hook into a stitch, yarn over, pull through, yarn over again, pull through two loops, yarn over again, and pull through the last two loops.
Create a small swatch to practice these stitches. It will build your confidence as you transition to your water bottle holder.
4. Measure Your Bottle
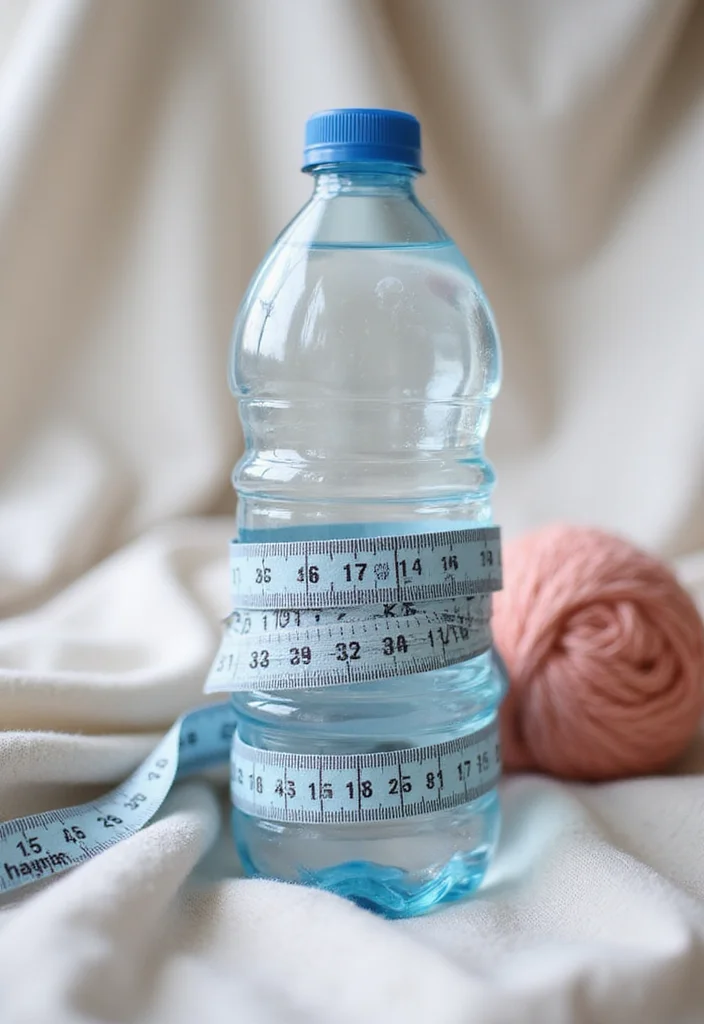
Measuring your water bottle is a crucial step for making a holder that fits just right. Use your measuring tape to find the height and circumference of your bottle. Add an inch to both measurements for some ease in your crochet design. This ensures your holder fits snugly while allowing some flexibility.
Here’s how to measure:
– Circumference: Wrap the measuring tape around the widest part of the bottle.
– Height: Measure from the bottom to just above the cap.
Accurate measurements are vital for avoiding the frustration of a holder that’s too tight or too loose!
5. Start Your Foundation Chain
Now it’s time to begin crocheting your water bottle holder with the foundation chain. This chain forms the base of your project. Make a slipknot on your hook and chain the number of stitches you measured earlier. Remember to keep the tension loose, which makes it easier to work into the chains later.
A good rule is to chain about one inch less than your bottle’s circumference. Follow these steps:
– Make a slipknot.
– Chain the required number of stitches.
– Count your chains to ensure accuracy.
This foundation is essential for supporting the rest of your design, giving you a perfect starting point for your crochet project!
6. Work in Rows or Rounds
You can choose to work in rows or rounds based on your design preference for your water bottle holder. Rounds usually offer a seamless finish, while rows give you more control over stitch changes. If you prefer rounds, join your last stitch to the first with a slip stitch to avoid seams. If you opt for rows, don’t forget to turn your work at the end of each row.
Here’s what to do:
– For rounds, crochet into the first stitch to create a loop.
– For rows, turn your work and chain one at the start of each new row.
Try both methods to see which one suits your style best. Every crocheter has their unique preferences!
7. Adding Texture and Patterns
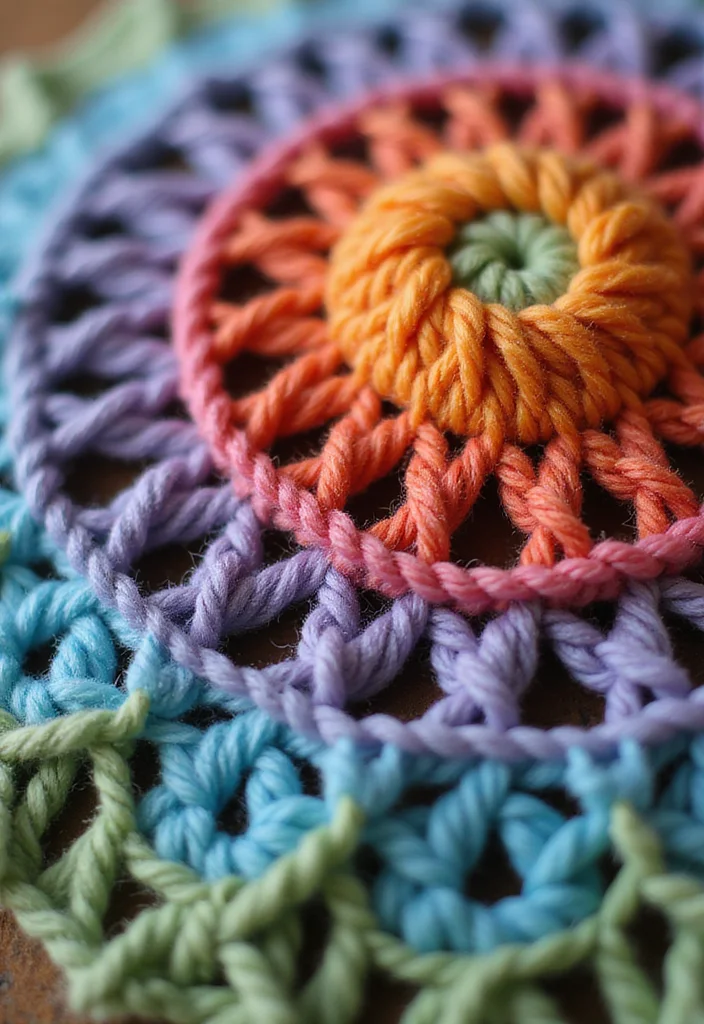
Once your holder takes shape, it’s time to add some flair with texture and patterns. Different stitches like shell or popcorn stitches can really make your water bottle holder pop. Alternating single and double crochet stitches creates a visually appealing pattern.
Here are some fun techniques to try:
– Shell Stitch: Create a fan-like pattern by working a series of double crochets into the same stitch.
– Popcorn Stitch: Work several double crochets into one stitch, then pull the first stitch through for a puffed effect.
These techniques not only beautify your holder but also add durability. Experiment with colors and stitches to develop a unique style that reflects your personality.
8. Create a Bottom for Stability
To make sure your water bottle holder stands upright, create a sturdy bottom. Work in a circle to form a flat base that matches the diameter of your bottle. This step is essential for functionality, as it prevents your holder from tipping over.
Here’s how to do it:
– Start with a magic ring or chain to create a circle.
– Gradually increase the number of stitches as you go around to keep the circle flat.
Check the size against your bottle frequently to ensure a perfect fit. A solid base will provide both stability and style to your holder.
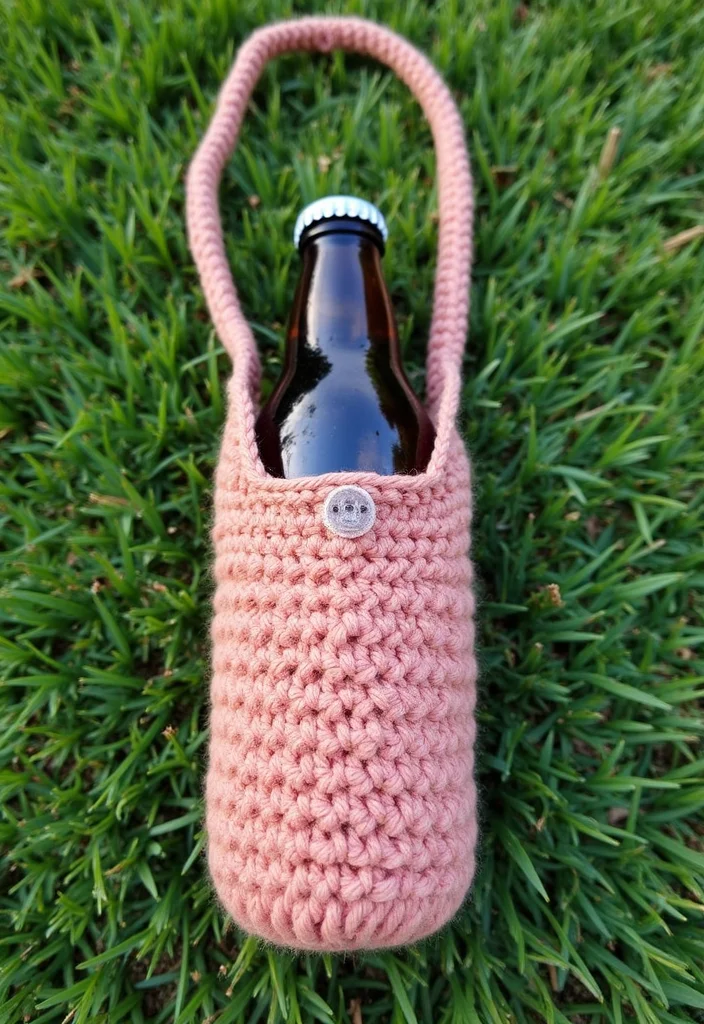
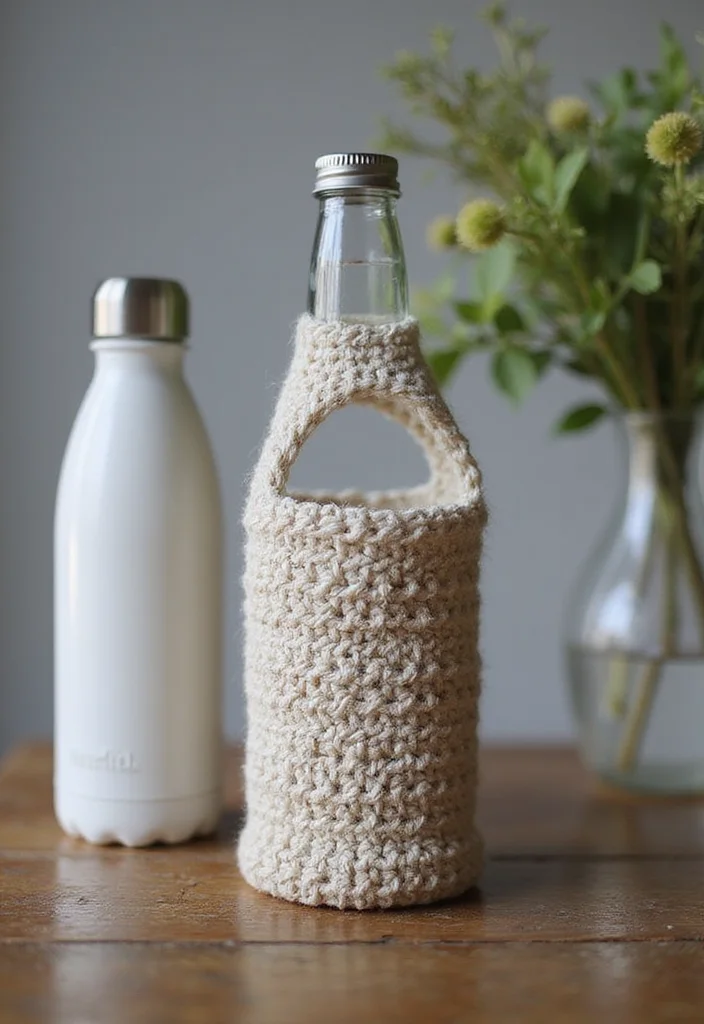
9. Incorporate a Strap or Handle

No water bottle holder is complete without a handy strap or handle! This feature allows you to hang the holder from your backpack or carry it over your shoulder. You can create a simple chain strap by chaining a comfortable length of yarn.
As you add the strap, keep these tips in mind:
– Ensure it’s long enough for easy access to your bottle.
– Consider using a different stitch or yarn for a splash of contrast.
Enhance the look by attaching buttons or beads at the ends of the strap. This detail can elevate your holder’s style while keeping it practical!
10. Finishing Touches
After completing your design, it’s time for the finishing touches. Weave in any loose ends with your yarn needle and give your holder a gentle wash to remove dust or stray fibers. You can also block your holder by lightly steaming it for a perfect shape.
Here’s how:
– Use a spray bottle with water to lightly dampen the crochet.
– Lay it flat and shape it to your desired dimensions.
These finishing touches not only complete your holder but also enhance its durability, making it ready for everyday use!
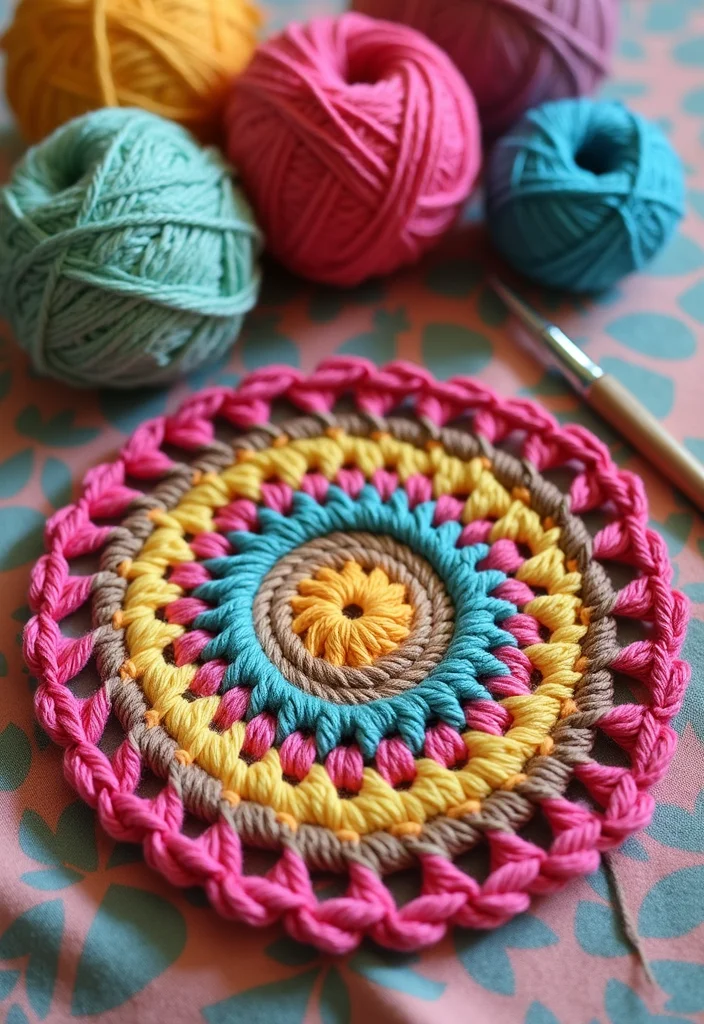
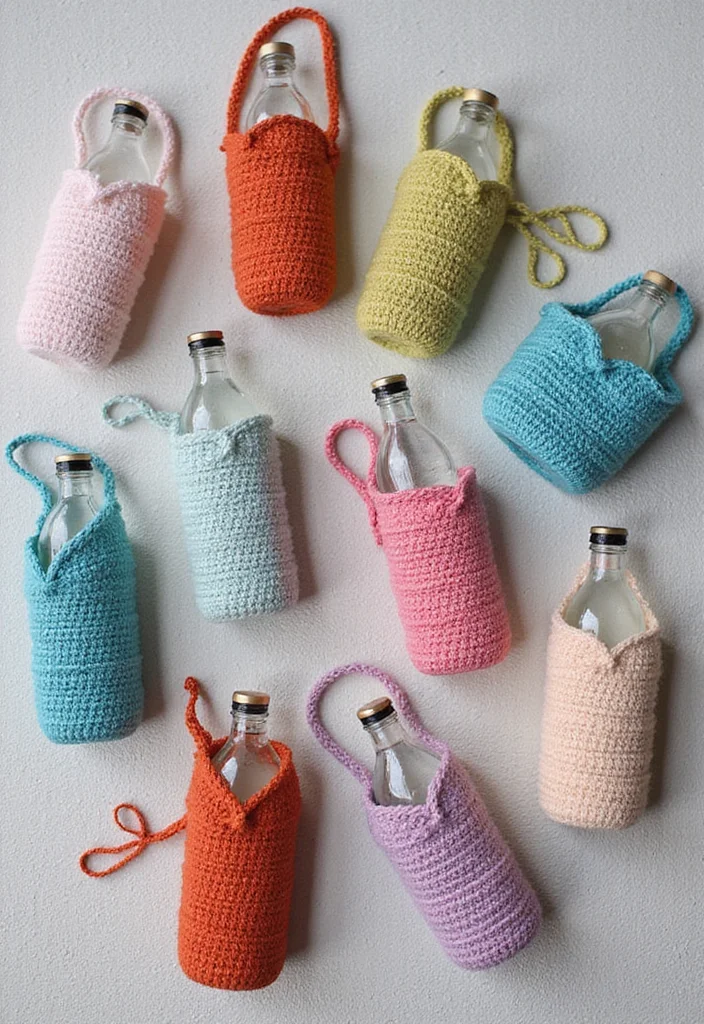
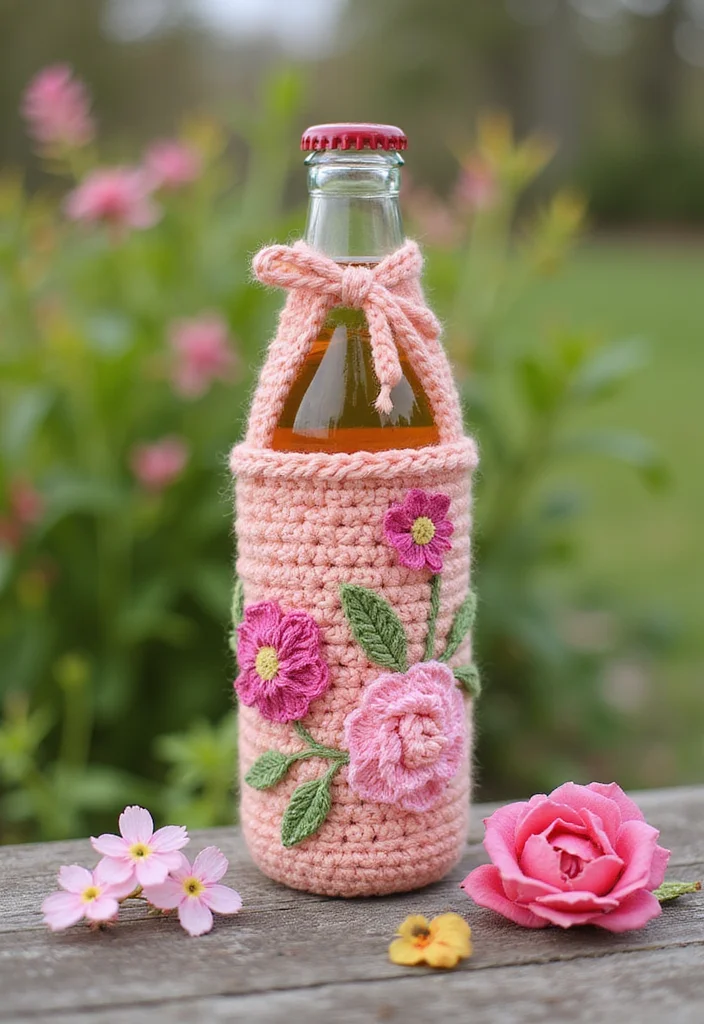
11. Personalize with Colors
Personalization is key when it comes to DIY accessories. With so many yarn colors available, you can make your water bottle holder truly your own. Opt for a monochrome look for elegance or mix and match colors for a fun pattern. Ombre yarn is also a great choice for a beautiful color transition.
Here’s how to choose colors wisely:
– Stick to two or three colors for a cohesive appearance.
– Feel free to experiment with contrasting colors for a bold look.
Your color choices can reflect your personality, giving your holder a unique touch that sets it apart!
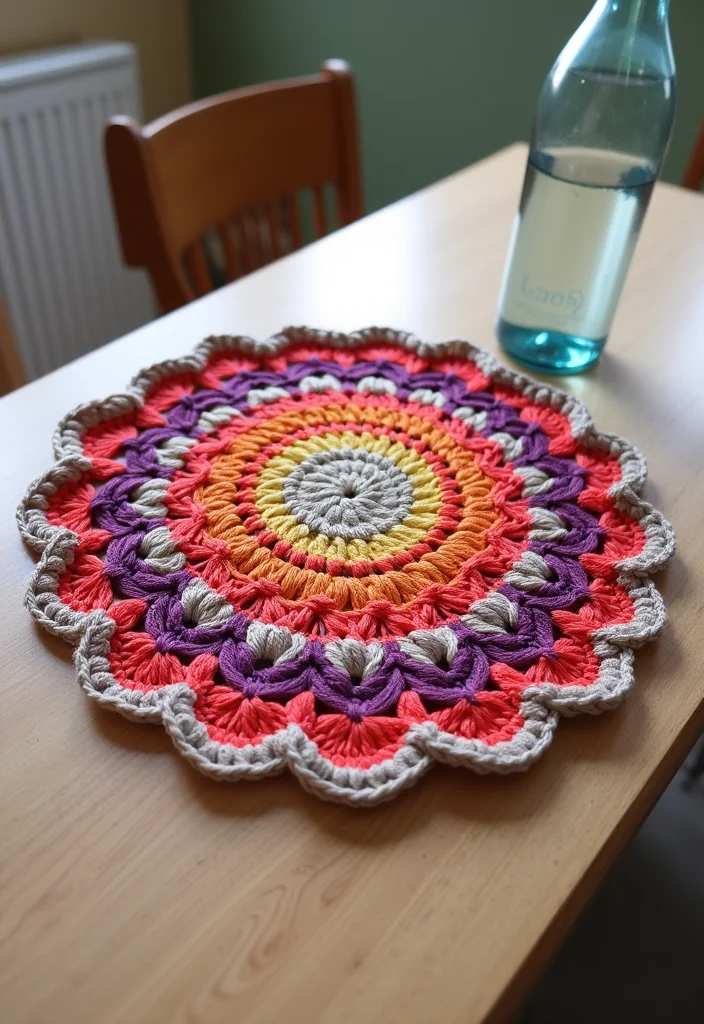
12. Explore Different Shapes
While starting with a standard cylindrical shape is great, don’t hesitate to think outside the box! Experimenting with different shapes can make your crochet water bottle holder even more exciting. Consider a triangular holder for a quirky look or a pouch-style holder for added convenience.
Here’s how to play with shapes:
– Use increases and decreases to shape your work.
– Challenge yourself with a hexagon or star-shaped design!
Each shape adds its own flair, and discovering one that resonates with you is part of the crafting joy.
13. Add Functional Pockets
Think about adding small pockets to your water bottle holder for extra functionality! These pockets can hold keys, a phone, or even snacks for your adventures. To make a pocket, just crochet a small rectangle and attach it to the side of your holder. Ensure it’s securely sewn on for durability.
Here’s a quick tip:
– Make the pocket slightly smaller than the item you plan to store.
– Use different yarn colors for the pocket to make it stand out.
This feature not only adds practicality but also brings some flair to your design!
14. Use Eco-Friendly Fibers
When selecting yarn, aim for eco-friendly fibers that support a sustainable lifestyle. Nowadays, many brands offer yarn made from organic cotton, bamboo, or recycled materials. These fibers help reduce plastic waste and support ethical manufacturing practices.
Here’s what to look for:
– Organic Cotton: Grown without harmful pesticides.
– Bamboo Yarn: Naturally biodegradable and soft.
– Recycled Yarns: Made from repurposed materials, offering unique textures.
By choosing eco-friendly options, you create beautiful crochet pieces while positively impacting the planet!
15. Try Seasonal Themes
One of the joys of crochet is creating pieces that reflect the changing seasons. You can design your water bottle holder with colors or motifs that capture the essence of each season. For instance, use pastel colors and floral designs for spring, vibrant hues for summer, warm tones for autumn, and cool colors for winter.
Here are some seasonal ideas:
– Spring: Floral patterns and soft pastels.
– Summer: Bright, tropical colors and sun motifs.
– Autumn: Earthy tones with leaf designs.
– Winter: Cool blues and snowflake patterns.
This creative approach allows you to express your style while keeping your accessories fresh throughout the year!
16. Host a Crochet Party
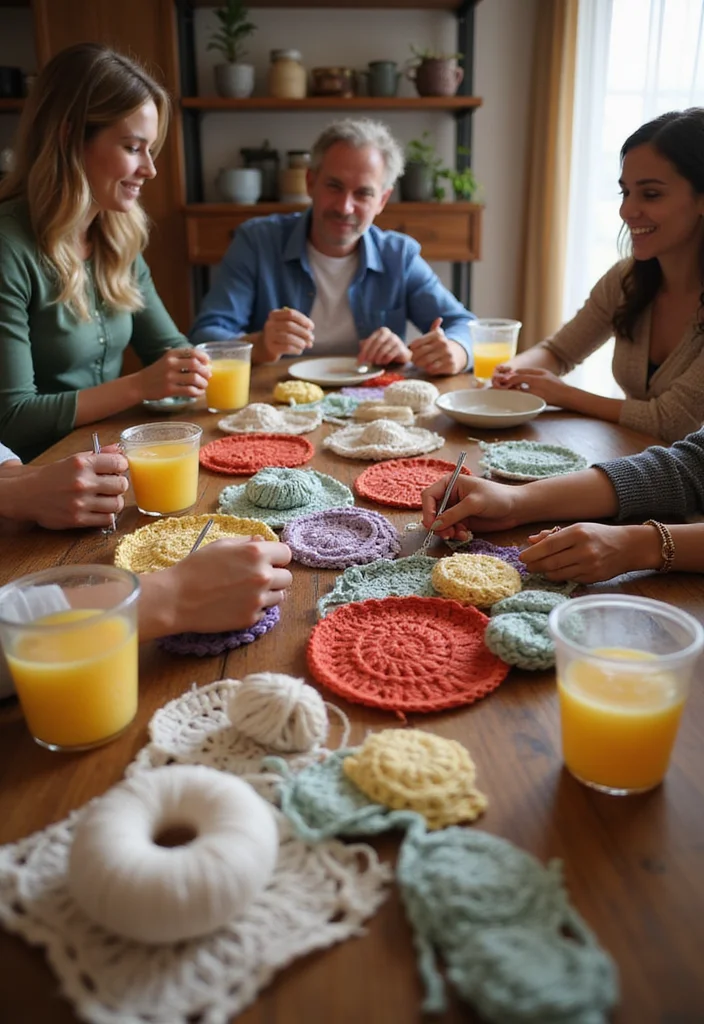
Crocheting can be so much more enjoyable when shared with friends! Consider hosting a crochet party where everyone can create their own water bottle holders. Set up a cozy space with plenty of yarn, hooks, and snacks. Encourage guests to bring their unique touches, whether it’s a favorite color or a special stitch.
Here’s how to make it fun:
– Provide a few basic patterns for beginners.
– Set up stations for different yarns and hooks.
– Share tips and tricks to create a supportive atmosphere.
This social aspect not only builds community but also turns crafting into a delightful experience!
17. Make It a Gift
Crochet water bottle holders make wonderful gifts! Whether it’s for a birthday, holiday, or just because, a personalized holder shows thought and care. You can customize your design based on the recipient’s favorite colors or interests. Adding a special touch, like their initials or a meaningful motif, makes it even more special.
To make it a perfect gift:
– Pair it with a reusable water bottle.
– Include a handwritten note about the eco-friendly aspect.
– Wrap it in natural materials to enhance sustainability.
Giving a handmade gift spreads joy while promoting a sustainable lifestyle for the recipient.
18. Show Off Your Creation
Once you’ve crafted your water bottle holder, it’s time to share your creation! Post your work on social media or within crafting communities. Capture photos that highlight your details and craftsmanship. Sharing your project inspires others and allows you to receive valuable feedback.
Here are some sharing tips:
– Use natural lighting for the best photos.
– Share your process and any challenges you faced.
– Engage with fellow crafters by asking for their insights.
Being part of this community can enhance your crafting journey and motivate you to tackle even more projects!
19. Join Crochet Communities
Being part of crochet communities can greatly enhance your crafting experience. Many online platforms and local groups offer resources, tips, and support for fellow crocheters. Joining these communities can inspire you with new ideas and keep your motivation high.
Here’s how to find and engage with communities:
– Look for local crochet clubs or online groups.
– Participate in challenges or swaps to connect with others.
– Follow crochet blogs and YouTube channels for tutorials.
Joining a community opens doors to friendships and collective creativity, making your crochet journey even more enjoyable.
20. Keep Learning and Experimenting
Crocheting is a journey filled with endless possibilities. After mastering your water bottle holder, consider expanding your skills! Experiment with different patterns, techniques, and projects to broaden your crochet repertoire.
Here are a few ideas to keep your creativity flowing:
– Explore advanced stitches and techniques.
– Challenge yourself with larger projects like bags or blankets.
– Attend workshops or crochet festivals for hands-on learning experiences.
The world of crochet is vast, and every new project adds to your skills and creativity.
Conclusion
Creating your own crochet water bottle holder is a fulfilling project that not only serves a practical purpose but also allows for endless creativity and eco-conscious living.
With the inspirations provided, you can tailor your holder to match your personal style while contributing positively to the environment. Embrace the journey of crochet, and let your creativity shine as you explore new ideas and techniques.
Frequently Asked Questions
What materials do I need to crochet a granny square cardigan?
To crochet a granny square cardigan, you’ll need some basic materials: crochet yarn, which is available in various colors, and a crochet hook that matches your yarn size. Don’t forget scissors and a yarn needle for weaving in ends! Having a comfortable workspace will also help you enjoy the cozy DIY crafts experience.
Are granny square cardigans suitable for beginners?
Absolutely! Granny square cardigans are perfect for beginners. The easy crochet tutorials help you master basic stitches, and you can work on squares individually, making it less overwhelming. Plus, as you gain confidence, you can experiment with different colors and patterns to create your unique handmade home decor!
How long does it typically take to crochet a granny square cardigan?
The time it takes to crochet a granny square cardigan varies based on your skill level and the pattern’s complexity. Generally, you can expect to spend anywhere from a few days to a couple of weeks. Just remember to enjoy the process and embrace the cozy vibe of granny square projects as you create your masterpiece!
Can I customize my granny square cardigan design?
Absolutely! One of the best things about crochet is the ability to personalize your work. You can choose different colors, sizes, and even add embellishments to your granny square cardigan. This is your opportunity to express your creativity and make a cozy DIY craft that truly reflects your style!
Where can I find crochet cardigan patterns for my granny square project?
You can find a variety of crochet cardigan patterns for granny square projects online. Websites like Ravelry and Pinterest are treasure troves of inspiration. Additionally, many crochet blogs and YouTube channels offer free patterns and tutorials to help you craft your handmade home decor. Happy crocheting!

